Have you ever experienced that heart-wrenching moment when your furry friend’s nail starts bleeding?
It’s distressing for both you and your dog. But fear not!
Understanding how to stop dog nail bleeding is crucial for every pet owner.
With the right knowledge and quick action, you can effectively handle this situation, ensuring your pet’s comfort and well-being.
Let’s dive into this complete guide for pet lovers on how to stop dog nail bleeding.
Contents Overview
Understanding Dog Nail Bleeding
Dog nail bleeding typically occurs when the quick, a blood vessel and nerve inside the nail, is cut during trimming.
This can happen if the nails are cut too short or if the quick is longer than usual due to lack of regular trimming.
Causes of Dog Nail Bleeding
Understanding the causes of dog nail bleeding is crucial for pet owners to prevent and effectively manage this common issue.
Several factors can contribute to nail bleeding in dogs, ranging from improper trimming techniques to underlying health conditions.
Let’s delve deeper into each cause:
1- Cutting the Nails Too Short
- When trimming your dog’s nails, it’s essential to avoid cutting them too short.
- You need to understand the anatomy of a dog’s nails. The quick, which contains blood vessels and nerves, extends into the nail. If the nail is trimmed too close to the quick, it can result in bleeding.
- Some dog breeds have clear or white nails, making it easier to see the quick. However, in dogs with dark-colored nails, identifying the quick may be more challenging, increasing the risk of accidental cutting.
2- Accidental Trimming of the Quick
- Even with the utmost care, accidents can happen during nail trimming. If the quick is inadvertently cut, it can lead to bleeding.
- Factors such as sudden movements by the dog or improper handling of the nail trimmer can increase the likelihood of accidentally nicking the quick.
3- Overgrown Nails Lead to Longer Quicks
- When a dog’s nails are allowed to grow too long without regular trimming, the quicks may also elongate.
- Long nails put pressure on the toes and can cause discomfort or changes in the nail structure, including longer quicks.
- Trimming overgrown nails requires extra caution to avoid cutting into the quick, as the quick may have extended farther down the nail.
4- Fractured or Split Nails
- Fractured or split nails are another common cause of nail bleeding in dogs. Trauma, such as catching a nail on a rough surface or getting it stuck in an object, can result in nail damage.
- Fractured or split nails may expose the quick, leading to bleeding and discomfort for the dog. Additionally, the exposed nail tissue is more susceptible to infection if not promptly addressed.
5- Underlying Health Conditions
- In some cases, nail bleeding may be indicative of underlying health issues.
- Conditions such as fungal or bacterial infections, autoimmune disorders, or systemic diseases can affect the health of the nails and surrounding tissues, increasing the likelihood of bleeding.
- It’s essential to monitor your dog’s overall health and consult with a veterinarian if you notice recurring nail bleeding or other concerning symptoms.
Understanding these causes empowers pet owners to take proactive measures to prevent nail bleeding in their dogs.
By practicing proper nail trimming techniques, monitoring nail length, and addressing any signs of nail damage or health issues, you can help keep your dog’s paws healthy and free from bleeding.
Immediate Steps to Stop the Bleeding
Accidents happen, and sometimes those accidents involve a clipped nail a little too close and a panicking pet parent (that’s you!).
A bloody dog nail might seem scary, but with a little know-how, you can stop the bleeding and get your furry friend back on their paws.
This guide will walk you through the steps to take control of the situation and ease the bleeding.
First Things First: Stay Calm!
Your dog can pick up on your anxiety, so take a deep breath and assure your pup with soothing words and pets (on a non-bleeding paw, of course!).
Step 1: Apply Pressure
Grab a clean cloth or paper towel and apply gentle but firm pressure directly to the bleeding nail for at least two minutes. This will help form a clot and slow the blood flow.
Step 2: Styptic Powder or Household Heroes
Here’s where you can stop the bleeding in its tracks. Styptic powder, readily available at most pet stores and pharmacies, is a lifesaver for these situations. Simply dip the bleeding nail tip or use a cotton swab to apply the powder.
Don’t have styptic powder?
No worries! Some household items can come to the rescue:
- Cornstarch: This pantry staple has absorbent properties that can aid clotting. Apply a small amount to the bleeding tip.
- Baking Soda: Another kitchen hero, baking soda can also help stop minor bleeding. Mix a little with water to create a paste and dab it on the nail.
- Flour: In a pinch, flour can also work similarly to cornstarch.
Step 3: Cold Compress (for Minor Bleeding)
For extra help with clotting, especially with minor bleeding, grab a clean cloth and wrap some ice cubes inside. Hold this compress against the bleeding nail for five minutes at a time. Repeat this process with intervals if needed.
Important Note
If the bleeding doesn’t stop after several minutes of applying pressure and styptic powder (or a substitute), or if the nail seems broken or torn, take your dog to the veterinarian right away.
With a little knowledge and these handy tips, you can be prepared to handle a bleeding nail situation calmly and effectively. Remember, an ounce of prevention is worth a pound of cure, so trim carefully and keep those puppy paws healthy!
Aftercare and Prevention
Proper aftercare and preventive measures are crucial aspects of managing dog nail bleeding and reducing the risk of recurrence.
Here’s a comprehensive guide on aftercare and prevention:
Aftercare
1- Monitor for Infection
- Keep a close eye on the nail for any signs of infection, such as redness, swelling, warmth, or discharge. Infections can occur if bacteria enter the wound during the bleeding episode.
- If you notice any concerning symptoms, contact your veterinarian for guidance on appropriate treatment.
2- Keep the Wound Clean and Dry
- Clean the affected nail and surrounding area with a mild antiseptic solution to prevent infection. Use a clean cloth or cotton ball dampened with the solution to gently wipe away any dirt or debris.
- Ensure the nail remains dry to promote healing. Avoid exposing it to moisture, such as wet grass or puddles, and refrain from submerging it in water during baths.
3- Prevent Licking or Chewing
- Dogs may instinctively try to lick or chew at the injured nail, which can delay healing and introduce bacteria to the wound.
- Prevent your dog from accessing the affected nail by using an Elizabethan collar (cone collar) or applying a bitter-tasting deterrent spray to discourage licking and chewing behavior.
4- Provide Pain Relief
- If your dog appears to be experiencing discomfort or pain, consult your veterinarian for appropriate pain relief options.
- Non-steroidal anti-inflammatory drugs (NSAIDs) or other pain medications may be prescribed to alleviate discomfort during the healing process.
Prevention
1- Regular Nail Trimming
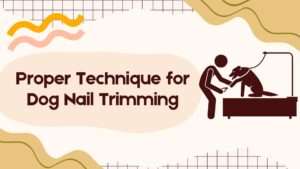
- Establish a routine for regular nail trimming to keep your dog’s nails at an appropriate length. The frequency of trimming depends on the rate of nail growth and individual nail characteristics.
- Aim to trim the nails before they become excessively long, as this helps prevent overgrowth of the quick and reduces the risk of accidental bleeding during trimming sessions.
2- Use Proper Nail Trimming Techniques
- Familiarize yourself with proper nail trimming techniques to minimize the risk of cutting the quick. Use sharp, high-quality nail trimmers designed specifically for dogs.
- Trim small amounts of the nail at a time, especially if you’re unsure of the quick’s location. Gradual trimming allows you to avoid cutting too close to the quick and reduces the likelihood of bleeding.
3- Be Cautious with Dark-Colored Nails
- Dogs with dark-colored nails pose a challenge when it comes to identifying the quick. Shine a flashlight behind the nail to visualize the quick as a dark shadow.
- Exercise extra caution and trim small amounts of the nail at a time to avoid cutting into the quick inadvertently.
4- Maintain Overall Paw Health
- In addition to nail care, maintain your dog’s overall paw health by regularly inspecting the paws for signs of injury, irritation, or foreign objects.
- Keep paw pads moisturized with pet-safe moisturizing balms to prevent dryness and cracking, which can lead to discomfort and potential nail issues.
By implementing these aftercare and preventive measures, you can promote optimal healing of the nail and reduce the likelihood of future nail bleeding incidents.
Consistent nail care, along with attentive monitoring and prompt intervention, ensures your dog’s paws remain healthy and free from discomfort.
When to Seek Veterinary Assistance
While most cases of dog nail bleeding can be managed at home, there are instances where veterinary assistance may be necessary.
Seek Veterinary Assistance If
- The bleeding doesn’t stop despite applying pressure and styptic powder.
- The bleeding is excessive or accompanied by other symptoms like swelling or signs of infection.
- Your dog seems to be in severe pain or distress.
Bottom Line
Dog nail bleeding can be a common occurrence, especially during nail trimming sessions.
However, with the right knowledge and quick action, you can effectively stop the bleeding and provide comfort to your canine companion.
Remember to stay calm, apply pressure, and use appropriate clotting agents to manage the situation.
With proper aftercare and preventive measures, you can minimize the risk of nail bleeding in the future, ensuring your furry friend’s paws stay healthy and happy.























+ There are no comments
Add yours